
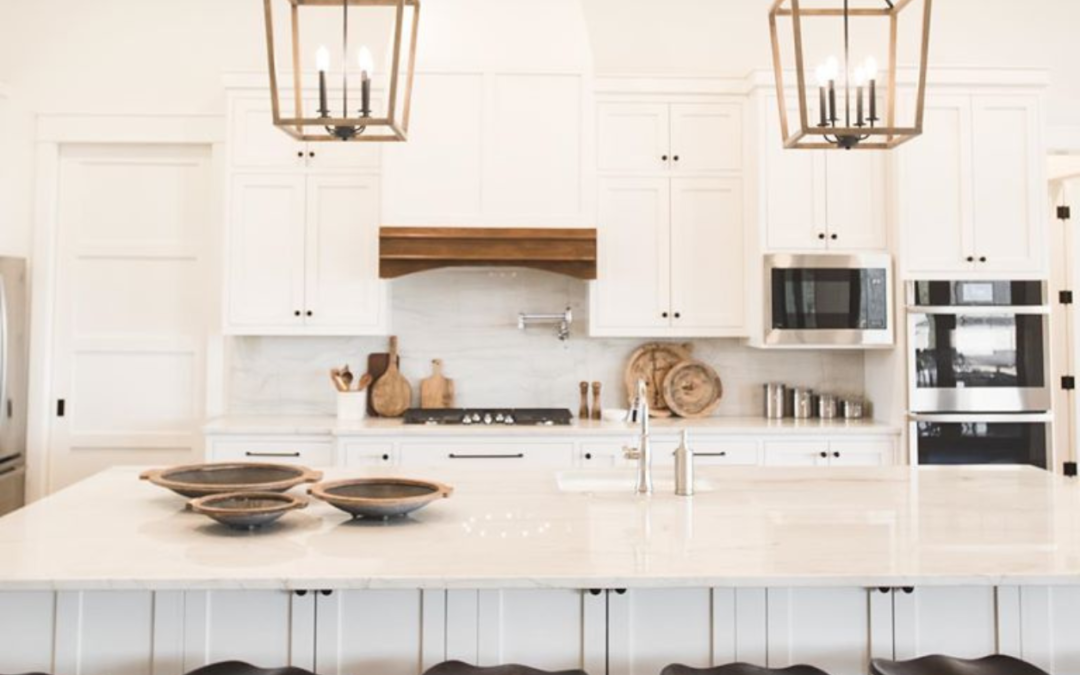
Your cabinets work hard every day. Hands open them. Pans bump them. Steam, grease, water, and cleaning products all test the finish. That is why cabinet painting needs more than leftover wall paint and a quick coat with a brush.
A great cabinet finish should look smooth, feel strong, and stay easy to clean. It should also fit the cabinet material, the room, and the look you want. The right paint can give old cabinets a fresh, high-end style. The wrong paint can leave you with chips, sticky doors, brush marks, or stains that will not wipe away.
At JT Paint & Design, we help homeowners make smart choices before the first coat goes on. In this guide, we explain the types of paints and finishes that painting pros trust for cabinet painting. We will also show you why prep, primer, sheen, and cure time matter just as much as the paint can.
The simple rule: Cabinets need a tough coating made for doors, trim, or cabinets. Standard wall paint is not built for the daily wear that cabinet doors face.
Why Cabinet Painting Needs a Different Kind of Paint
Walls mostly sit still. Cabinets do not. Cabinet doors open and close many times each day. Drawers slide in and out. Knobs and pulls take constant contact. Kitchen cabinets also sit near heat, food, grease, and water. Bathroom cabinets face moisture and splashes.
Because cabinets take so much use, they need a finish that does three important jobs. First, it needs to bond well to the old surface. Second, it needs to level as it dries, which helps reduce brush lines and roller texture. Third, it needs to cure into a hard film that can handle normal cleaning and daily use.
Paint makers build cabinet, door, and trim coatings with these needs in mind. For example, Benjamin Moore describes its INSL-X Cabinet Coat as a cabinet finish that resists chipping, scuffing, food stains, grease, and water. The product is sold in satin and semi-gloss options, which are popular sheens for active cabinet surfaces.
The best cabinet paint is not always the same for every home. A busy family kitchen may need a very washable, durable finish. A bathroom vanity may need a coating that handles moisture well. A detailed, older cabinet door may need a product that levels slowly and smoothly. A smart paint plan looks at the full project, not just the color.
Best Paint Types for Cabinet Painting
There is no one “magic” paint for every cabinet. However, several coating types are reliable choices when the surface is prepared well and the product is applied as directed.
1. Waterborne Urethane-Modified Alkyd Enamel
This is one of the most common choices for a smooth, durable cabinet finish. It mixes some of the feel of old-style oil or alkyd paint with the easier cleanup of a water-based product. It is often used on cabinets, doors, trim, and other surfaces that get touched a lot.
A waterborne urethane-modified alkyd enamel can be a strong choice when you want a finish that looks refined but can still handle daily kitchen life. These paints often level well, which can help doors look less like they were painted by hand and more like they came from a shop.
Sherwin-Williams Emerald Urethane Trim Enamel is one well-known example. The manufacturer lists it as a water-based urethane-modified alkyd and says it is designed for areas that need frequent cleaning. It also comes in satin, semi-gloss, and gloss sheens, and it is made to resist yellowing better than traditional oil-based paints.
This type of paint is a good fit for many kitchen cabinets, bathroom vanities, built-ins, and painted wood trim. It is especially helpful when you want a durable finish but do not want the strong odor or difficult cleanup that often comes with old-fashioned oil paint.
The tradeoff is patience. A paint can feel dry before it is fully cured. Cabinet doors should not be rushed back into hard daily use just because they no longer feel wet. Your painting team should follow the product’s dry and cure directions closely.
2. Cabinet-Specific Waterborne Acrylic Coatings
Some products are made just for cabinets, furniture, and trim. These cabinet-specific coatings are often water-based and made to go on smoothly while still forming a tough surface.
INSL-X Cabinet Coat is a strong example of this category. Benjamin Moore says the coating is designed for kitchen and bathroom cabinets, furniture, doors, trim, and other interior surfaces where an ultra-smooth finish is wanted. The company also notes that the product has strong adhesion and is designed to resist scuffs, chips, food stains, grease, and water.
A cabinet-specific coating can be a good choice when you want a product that directly targets the problems cabinet surfaces face. It also offers a simple way to choose a finish system because the product was made with cabinet use in mind.
Still, “cabinet paint” on the label does not mean prep can be skipped. The same manufacturer says that cabinet surfaces should be clean, dry, sound, and free of dirt, grease, oils, waxes, and other contaminants. It also calls for glossy areas to be lightly sanded so the surface is more ready for paint.
3. Premium Cabinet, Door, and Trim Enamel
Another reliable group includes premium paints labeled for cabinets, doors, and trim. These coatings are built for more contact and cleaning than common wall paint. Many come in satin and semi-gloss, and they can work on a range of properly prepared surfaces.
BEHR PREMIUM Cabinet, Door & Trim Enamel is one example. The company says the product offers flow and leveling for a smooth finish and dries to a hard, durable surface. It also says the coating resists dirt, grime, and household chemicals. The label calls for two coats for the best durability.
This kind of product can work well for homeowners who want a cabinet-ready enamel that offers a clear, practical application system. But product choice is only one part of the plan. Even a great enamel will not perform well if it goes over grease, loose paint, or a slick factory finish without the right prep.
4. Sprayed Professional Cabinet Coatings
For some projects, a pro may use a spray-grade cabinet coating. These finishes are often chosen for large kitchen updates, detailed doors, or homes where the owner wants a very even, factory-like look. Spray application can help a coating lie down smoothly across flat door faces and raised details.
The finish itself still matters more than the tool. Spraying a weak paint does not make it durable. A professional needs the right coating, the right spray setup, clean work areas, and enough dry time between coats. Good masking and dust control also matter. If dust lands in fresh paint, it can make a new cabinet finish feel rough.
JT Paint & Design chooses the paint system based on the cabinet material, the room, the color, the sheen, and the level of use. A professional should always follow the product label and technical directions for thinning, spray settings, recoat time, and cure time.
Paint, Primer, and Prep Work Together
Homeowners often ask, “Do my cabinets need primer?” The honest answer is: sometimes, and very often it is the smart choice. Primer is not just an extra coat. It can help the paint bond, even out the surface, and block stains or wood tannins when needed.
A bonding primer is especially useful when cabinets have a glossy clear coat, slick laminate-like surfaces, old paint, stains, or a big color change. It can also help when the cabinet material is hard to identify. Your painter can test a small hidden area first to make sure the selected system is bonding well.
Sherwin-Williams recommends cleaning cabinets with a cleaner degreaser before priming and testing adhesion in a hidden spot. Its cabinet-painting guide also warns that surfaces that are not clean, dry, and dull can hurt adhesion and shorten the life of the coating.
This is why professional cabinet painting starts long before paint goes on. A strong process often includes the following steps:
1. Label and remove doors, drawers, and hardware. This makes it easier to paint edges and avoids paint buildup around hinges and pulls.
2. Clean the surfaces well. Kitchen grease can be hard to see, but it can stop paint from bonding.
3. Repair flaws. Fill holes, dents, cracks, and worn areas so they do not show through the new finish.
4. Sand or scuff sand as needed. The goal is not always to remove every old layer. The goal is to create a clean, dull, sound surface that the new system can hold.
5. Remove all dust. Dust left behind can make paint feel rough and can weaken the finish.
6. Prime when the surface or paint system calls for it. This step helps build a stable base.
7. Apply thin, even finish coats. Thick paint may sag, dry unevenly, or show more texture.
8. Let the finish dry and cure. Reinstalling doors too soon can damage fresh paint where doors and drawers touch.
The paint and primer must work as a team. For example, BEHR recommends cleaning and scuff sanding glossy surfaces, repairing flaws, and priming properly prepared surfaces before applying its cabinet, door, and trim enamel. It also recommends lightly sanding the primer before the topcoat for best results.
Satin vs. Semi-Gloss: Which Cabinet Finish Is Best?
After choosing the paint type, you need to choose the sheen. Sheen is how shiny or light-reflective the finish looks. For most cabinet painting projects, satin and semi-gloss are the top choices.
Satin is often the safe, flexible choice. It has enough sheen to look clean and finished, but it does not reflect as much light as semi-gloss. That can make small marks and older door details less noticeable.
Semi-gloss gives cabinets a brighter, sharper look. It can be a good fit for a family kitchen because it has a clear, cleanable finish. But it also shows more surface problems. If doors have dents, deep grain, rough repairs, or brush marks, semi-gloss may make them easier to see.
Gloss has the most shine. It can look beautiful on very smooth, well-prepared doors, but it takes more careful prep and application. It is not the first choice for every home.
The good news is that many professional-grade cabinet products offer both satin and semi-gloss. For example, INSL-X Cabinet Coat comes in satin and semi-gloss, while Emerald Urethane Trim Enamel is available in satin, semi-gloss, and gloss.
The Finish Matters, but So Does the Color
Color can change how a cabinet finish looks. White and light colors often make a kitchen feel open and bright. Deep blues, greens, and blacks can add drama. Warm beige and soft gray can create a calmer look.
But color also changes what you see. Dark colors can show dust, fingerprints, and tiny scratches more easily. Very bright white can show marks near handles. A skilled painter can help you choose a color and sheen that fit both your style and your daily life.
Before committing, look at a real sample on or near your cabinets. Check it in morning light, afternoon light, and at night. Also look at it next to your countertops, backsplash, flooring, and wall paint. A color chip in a store cannot show you everything that happens in your home.
Why Dry Time and Cure Time Are Not the Same
This point is easy to miss. Dry time means the paint is dry enough for the next step, such as another coat. Cure time means the coating has had more time to become strong and ready for normal wear.
A cabinet door can feel dry to the touch but still be easy to dent, scratch, or stick to another surface. This is why a professional cabinet painting project needs a clear schedule. The work cannot be judged only by how fast the paint feels dry.
Sherwin-Williams advises waiting about 24 to 48 hours after the first coat before the second coat in its cabinet guide, then waiting another 24 to 48 hours before reinstalling hardware. Product directions can change by coating, color, room temperature, and humidity, so the label should always guide the schedule.
BEHR also notes that darker colors, cooler temperatures, and higher humidity can require more dry time. It says its cabinet enamel’s cured paint film can be cleaned with mild, non-abrasive liquid detergent after two weeks.
At JT Paint & Design, we help set clear expectations so your cabinets get the time they need. This care protects the finish and helps your newly painted cabinets look better for longer.
Common Cabinet Painting Mistakes to Avoid
Many failed cabinet projects share the same problems. Knowing them can help you spot the value of a professional process.
Using wall paint on cabinets. Wall paint is made for a different job. It may look fine at first, but it can wear down faster on doors and drawers.
Skipping cleaning. Grease, oil, polish, and grime can stop paint from bonding. A cabinet can look clean and still have a film on it.
Skipping the test spot. A small test can reveal adhesion trouble before the whole kitchen is coated.
Applying thick coats. Thick paint can drip, sag, or stay soft longer. Thin, even coats are usually the better path.
Choosing a sheen without fixing the surface. The shinier the finish, the more it can show bumps and rough spots.
Rushing reassembly. Doors, drawers, and hardware can mark fresh paint if they go back too soon.
Ignoring the whole system. The cleaner, sanding steps, primer, paint, tools, and cure time all need to work together. One weak step can hurt the final result.
How JT Paint & Design Chooses the Right Cabinet Coating
Every cabinet project starts with a close look at the existing surface. Are the cabinets solid wood, veneer, laminate, or previously painted? Do they have a glossy factory finish? Are there grease stains, water damage, deep grain lines, or chips around the pulls? Is the project in a kitchen, bathroom, laundry room, or built-in area?
Those answers guide the plan. A coating that works well over one clean, painted wood cabinet may not be right for a slick, worn, or stained surface. The best choice is a full system: correct cleaning, needed repairs, proper sanding, the right primer, and a high-quality cabinet coating in a sheen that fits the space.
We focus on durable products made for surfaces that get touched and cleaned often. We also focus on workmanship. The best paint will not hide poor prep. By taking time to prepare doors, protect the work area, apply even coats, and respect cure time, JT Paint & Design aims for cabinets that are beautiful, smooth, and ready for real life.
Refresh Your Cabinets With a Finish Built to Last
Cabinet painting can change the look of your kitchen or bathroom without changing the whole layout. But lasting results come from more than a popular paint color. They come from choosing a tough coating, a practical sheen, and a paint system that fits the cabinet surface.
For many homes, a waterborne urethane-modified alkyd enamel, a cabinet-specific waterborne coating, or a premium cabinet, door, and trim enamel can be an excellent choice. Satin and semi-gloss are both strong options, depending on the look and level of shine you want. Most of all, do not treat prep and cure time as shortcuts. They are part of the finish.
If you are thinking about cabinet painting, JT Paint & Design can help you choose a durable paint and finish that works for your home. We will help you move from worn cabinets to a clean, polished look that feels made for your space.