Are your kitchen cabinets looking a little tired? Do you dream of a fresh, new look for your kitchen without the cost and hassle of a full remodel? If so, you’re in the right place.
Professional cabinet painting is a fantastic way to transform your kitchen, giving it a new lease on life for a fraction of the cost of new cabinets. A professional paint job can add significant value to your home, with many homeowners seeing a return on investment of 50% or more.
But what exactly does professional cabinet painting involve? What should you, the homeowner, expect from this process? It’s a big decision, and it’s natural to have questions. This guide will walk you through every step of the professional cabinet painting process, from the initial consultation to the final, beautiful finish. We’ll demystify the process, so you can feel confident and excited about your kitchen’s transformation.
Why Preparation is Everything
You might have heard the saying, “it’s all in the prep.” When it comes to painting, and especially cabinet painting, this couldn’t be more true. Proper preparation is the single most important factor in achieving a beautiful, long-lasting finish. In fact, professional painters spend the majority of their time on prep work, sometimes up to 70% of the entire project time!
So, what does this all-important prep work entail? It’s a multi-step process that ensures your cabinets are in the perfect condition to receive a new coat of paint.
Step 1: The Great Takedown
The first thing your professional painting team will do is carefully remove all your cabinet doors, drawers, and hardware. Each piece is meticulously labeled to ensure everything goes back in its exact original spot. This might seem like a small detail, but it’s crucial for a seamless reassembly.
Step 2: The Deep Clean
Next, every surface of your cabinets, both the boxes and the removed doors and drawers, gets a thorough cleaning. Over the years, kitchen cabinets accumulate a surprising amount of grease, grime, and cooking residue. This buildup can prevent the new paint from adhering properly, leading to peeling and chipping down the road.
Professional painters use special degreasers, like trisodium phosphate (TSP), to ensure every last bit of residue is removed. This is a powerful cleaner that cuts through grease and grime, leaving a clean surface for the next steps.
Step 3: The Sanding Stage
Once your cabinets are clean and dry, it’s time for sanding. This step is all about creating a surface that the primer can grip onto. Without a properly sanded surface, even the best paint in the world won’t stick. Professional painters use fine-grit sandpaper, typically between 180 and 220 grit, to gently scuff the existing finish, creating a slightly rough texture for the primer to bond with.
They may also sand between coats of primer and paint to ensure an ultra-smooth finish. The type of wood your cabinets are made from will also determine the sanding process. For example, oak cabinets have a more pronounced grain that may require a more thorough sanding to achieve a smooth finish.
Step 4: The Flawless Finish
Finally, any dings, dents, or imperfections in the wood are filled with a high-quality wood filler. Once the filler is dry, these areas are sanded smooth, creating a flawless surface. The goal is to make your cabinets look as close to new as possible before any paint is even applied.
The Day-by-Day Cabinet Painting Timeline
One of the most common questions homeowners have is, “How long will this take?” While every project is a little different depending on the size of your kitchen and the condition of your cabinets, a professional cabinet painting project typically takes between 3 and 7 days.
Here’s a general day-by-day breakdown of what you can expect:
Day 1: Setup and Removal
On the first day, your painting team will arrive and begin by protecting your home. They’ll cover your floors, countertops, backsplash, and appliances with plastic sheeting and drop cloths to keep everything clean and paint-free. Then, they’ll begin the process of removing and labeling your cabinet doors, drawers, and hardware.
Days 2-3: The Prep Work Continues
These days are dedicated to the all-important prep work. Your cabinets will be thoroughly cleaned, sanded, and any necessary repairs will be made. Once the surfaces are perfectly prepped, the first coat of primer will be applied.
A high-quality bonding primer is essential for creating a strong foundation for the paint and preventing any old stains or wood tannins from bleeding through the new color. Proper drying time for the primer is crucial. Rushing this step can lead to a poor-quality finish.
Days 4-5: The Transformation Begins
Now for the exciting part – the painting! Your cabinets will receive multiple thin coats of high-quality paint, with adequate drying time between each coat. Most professional painters will apply at least two coats of finish paint, but some projects, especially those involving a dramatic color change (like going from dark wood to a bright white), may require a third coat.
Days 6-7: The Big Reveal
Once the paint has had sufficient time to cure, it’s time for reassembly. Your beautifully painted cabinet doors and drawers will be carefully reinstalled, along with your hardware. The painters will then do a final inspection, touching up any areas that need it. They’ll also walk you through the proper care and cleaning of your newly painted cabinets to ensure they stay looking beautiful for years to come.
What to Expect in Your Home During the Project
It’s important to be realistic about the fact that your kitchen will be a work in progress during the cabinet painting process. While professional painters will do their best to minimize disruption, your kitchen will not be fully functional for a few days.
If your painters are working on-site, you can expect to see plastic sheeting, fans for ventilation, and, of course, the smell of paint. You’ll likely lose access to your cabinets for the duration of the project, so it’s a good idea to plan for some simple meals that don’t require a lot of cooking or storage. Many homeowners find it helpful to set up a temporary kitchen station in another room with a microwave, coffee maker, and paper plates.
Some painting companies have an off-site spray booth where they will take your cabinet doors and drawers to be painted. This can be a great option as it minimizes the mess and smell in your home. In this case, you’ll still have access to your cabinet boxes, but without the doors.
Before the project begins, be sure to have a clear conversation with your painting contractor about the timeline and what to expect in terms of disruption. This will help you plan accordingly and make the process as smooth as possible.
Here is a checklist to help you prepare your home for the painters:
• Empty your cabinets:
This is the most important step. Remove everything from your cabinets and drawers and store it in another room.
• Clear your countertops:
Remove all appliances, decorations, and other items from your countertops.
• Create a clear path:
Make sure there is a clear path for the painters to move in and out of your kitchen and to carry the cabinet doors and drawers.
• Plan for pets and kids:
If you have pets or small children, it’s a good idea to make arrangements to keep them out of the work area during the project.
• Designate a workspace:
If your painters will be working on-site, designate a workspace for them, such as a garage or basement. Make sure the space is well-lit and ventilated.
The Right Paint for the Job
Not all paints are created equal, especially when it comes to cabinets. Kitchen cabinets are a high-traffic area, and they need a paint that can stand up to daily use, cleaning, and the occasional bump or scrape. Professional painters use high-quality, durable paints that are specifically designed for cabinetry. These paints cure to a hard, durable finish that is resistant to chipping, scratching, and staining.
Some of the most popular choices for cabinet paint include:
• Alkyd or Oil-Modified Paints:
These paints are known for their excellent leveling properties, which means they dry to a very smooth, brush-stroke-free finish. They are also very durable. The downside is that they have a longer dry time and a stronger odor during application.
• Acrylic-Alkyd Hybrids:
These water-based paints offer the durability of oil-based paints with the easy cleanup and lower odor of acrylic paints. They have become a popular choice for cabinet painting in recent years.
• Lacquers and Conversion Varnishes:
For the most durable, factory-like finish, some professionals use lacquers or conversion varnishes. These products require special spray equipment and ventilation, but they cure to an extremely hard, chemical-resistant finish.
When you’re getting quotes from professional painters, be sure to ask them what type of paint they use and why. A reputable painter will be happy to explain their product choices and the benefits of the paint they use.
Choosing the Right Color and Finish
Choosing the right color and finish for your cabinets is a big decision. The color of your cabinets will have a major impact on the overall look and feel of your kitchen. If you’re not sure what color to choose, a professional painter can help you select a color that will complement your countertops, backsplash, and flooring.
The finish of your paint is also important. A high-gloss finish will be the most durable and easiest to clean, but it will also show every imperfection in the wood. A matte finish will be less durable and harder to clean, but it will hide imperfections well. A satin or semi-gloss finish is a good compromise between durability and appearance.
DIY vs. Professional Cabinet Painting
Many homeowners are tempted to save money by painting their cabinets themselves. While it is possible to achieve a good result with a DIY cabinet painting project, it is a very time-consuming and difficult job. It requires a great deal of patience and attention to detail. If you are not an experienced painter, you are likely to be disappointed with the results.
Hiring a professional painter will save you time and stress. A professional painter has the experience and expertise to do the job right. They also have the right tools and equipment to achieve a flawless finish. In the long run, hiring a professional painter is often a better value than doing it yourself.
Choosing the Right Professional Painter
If you have decided to hire a professional painter, it is important to choose the right one. Here are a few tips on how to choose the right professional painter for the job:
• Get multiple quotes: Get quotes from at least three different painters before you make a decision.
• Check references: Ask each painter for a list of references and be sure to check them.
• Look at their portfolio: Ask to see a portfolio of their work. This will give you a good idea of their quality of work.
• Get a written contract: Before you hire a painter, be sure to get a written contract that outlines the scope of work, the materials that will be used, the timeline, and the total cost.
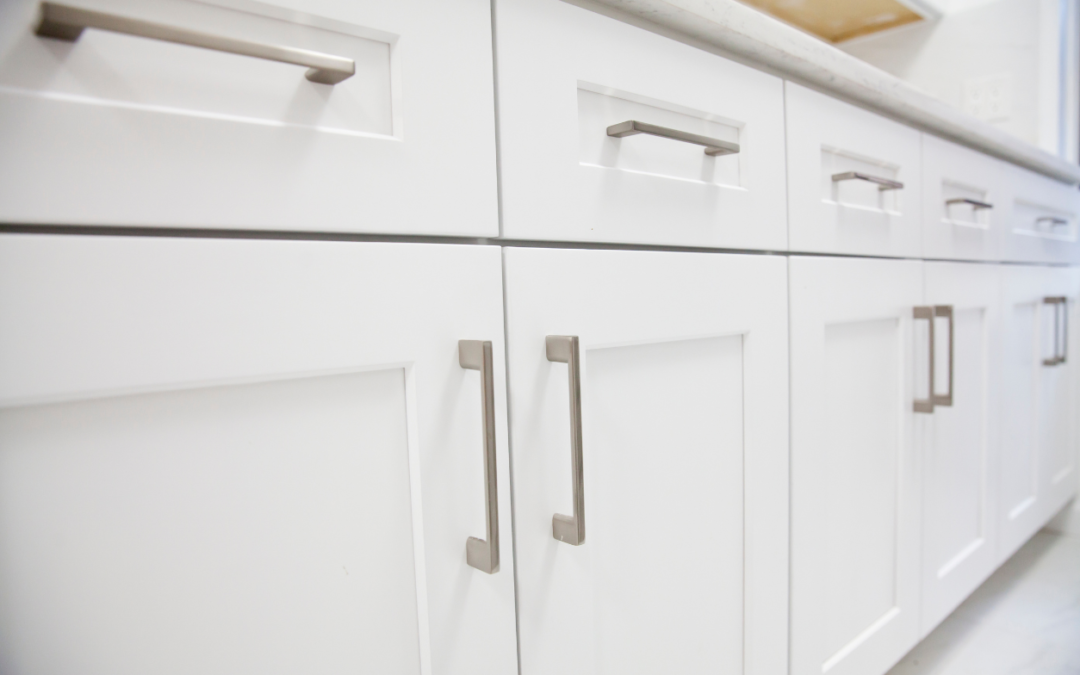
The Final Result: A Kitchen Transformed
After a few days of work, your kitchen will be transformed. Your old, tired cabinets will look brand new, and your entire kitchen will have a fresh, updated look. Professional cabinet painting is a powerful way to improve the look and feel of your home, and with proper care, your newly painted cabinets will stay beautiful for years to come.
To care for your newly painted cabinets, simply wipe them down with a soft, damp cloth. Avoid using harsh chemicals or abrasive cleaners, as these can damage the finish. With a little bit of care, your newly painted cabinets will look great for many years to come.
If you’re ready to give your kitchen the makeover it deserves, contact a professional painter for a consultation. They can help you choose the perfect color and finish for your cabinets and answer any questions you may have about the process. With a little bit of planning and the help of a skilled professional, you can have the kitchen of your dreams.