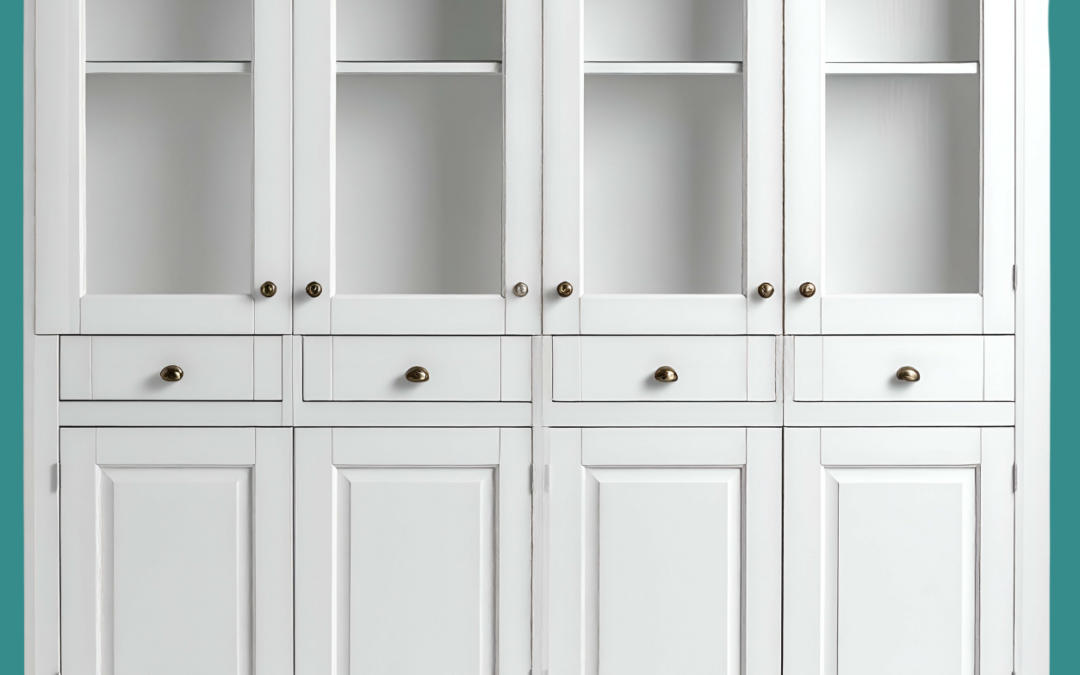
Congratulations! You’ve just made a fantastic investment in your home. A professional cabinet painting job from JT Paint & Design can completely transform your kitchen or bathroom, breathing new life into the space and making it feel fresh, clean, and modern. That beautiful, smooth finish is a joy to look at, and you’re probably wondering how to keep it that way for years to come. You’re in the right place.
Taking care of your newly painted cabinets isn’t difficult, but it does require a different approach than caring for factory-finished or stained wood cabinets. The key is to be gentle and consistent. With a little bit of know-how, you can easily protect your investment and ensure your cabinets remain a source of pride and beauty in your home for a decade or more.
This guide will walk you through everything you need to know, from the crucial first few weeks after painting to your new routine for daily care and deep cleaning.
The Golden Rule: Wait for the Paint to Cure
This is, without a doubt, the most important step in ensuring the long-term durability of your painted cabinets. It’s easy to get confused between paint that is “dry” and paint that is “cured.” While they might sound the same, they are very different. Understanding this difference is the secret to preventing accidental dings, scratches, and smudges on your new finish.
Paint is considered dry to the touch when the solvents have evaporated, and it no longer feels sticky. This usually happens within a few hours. However, curing is the process where the paint fully hardens and bonds to the surface, reaching its maximum level of durability and resistance to wear and tear. This process takes much longer.
Think of it like a cake. When you take it out of the oven, it might look done on the outside, but the inside is still soft and gooey. You have to let it cool and set completely before you can frost it. Curing is the paint’s version of “setting.”
During this critical curing window, you need to treat your cabinets with extra care. Here’s what you should do and, more importantly, what you should not do:
• Be Gentle:
Avoid slamming cabinet doors or drawers. The impact can easily cause chips or dents in the still-soft paint.
• Keep Surfaces Clear:
Do not place heavy objects on the shelves or lean anything against the cabinet doors. Avoid the temptation to immediately reorganize your kitchen and slide stacks of plates or appliances against the fresh paint.
• No Cleaning (Yet!):
Do not attempt to scrub or clean the cabinets, even with a gentle cloth. If you notice a small spill, you can gently dab it with a slightly damp, soft cloth, but avoid any rubbing motion. The friction can damage the finish.
• Promote Good Airflow:
You can help the curing process along by ensuring the room has good ventilation. Running a fan or opening a window can help the paint harden more efficiently. However, try to maintain a stable temperature and avoid high humidity, as extreme conditions can slow down the curing time.
Being patient for these first few weeks is your best strategy. It allows the paint to form a hard, protective shell that will be much more resistant to the daily activities of a busy kitchen or bathroom. Once the curing period is over, you can begin your new, easy maintenance routine.
Your New Cleaning Routine: The Do’s
Once your cabinets are fully cured, keeping them clean is simple. You don’t need a cabinet full of expensive, specialized cleaners. In fact, the best tools for the job are probably already in your home. The philosophy is simple: be gentle and be regular.
For Everyday Dust and Spills
Life happens. Fingerprints appear, a splash of sauce lands on a door, and dust settles. For these minor daily messes, a quick and gentle approach is all you need.
• Dust Regularly:
Use a clean, dry microfiber cloth to gently wipe away dust. A microfiber cloth is excellent because it traps dust particles instead of just pushing them around. Do this once a week or as needed to prevent buildup.
• Wipe Spills Immediately:
The most important habit you can develop is to wipe up spills, splatters, and water spots as soon as they happen. Use a soft cloth (microfiber is perfect here, too) dampened with warm water. Wipe the spot gently and then immediately dry the area with a separate dry cloth. This prevents moisture from sitting on the paint and stops food-based spills from staining.
For Weekly or Bi-Weekly Cleaning
For a more thorough cleaning to remove the general grime of a busy kitchen, a simple and mild solution is your best friend. This is the method you’ll use most often.
The Best Method: Mild Dish Soap and Warm Water
This is the gold standard for cleaning painted cabinets. It’s effective, safe, and cheap. Most professional painters recommend this simple solution.
Create the Solution:
Fill a bucket or your sink with warm water and add a few drops of a mild dish soap, like Dawn. Swish the water around to create some gentle suds.
Wipe the Cabinets:
Dip a soft, non-abrasive sponge or microfiber cloth into the soapy water and wring it out until it is just damp, not dripping wet.
Clean Gently:
Wipe down the cabinet surfaces, paying special attention to areas around handles and knobs where fingerprints and grime tend to accumulate. Use a gentle, circular motion. There is no need for “elbow grease.” Let the soap and water do the work.
Rinse the Surface:
After cleaning, take a second clean cloth, dampen it with plain water, and wipe the cabinets again to remove any soap residue.
Dry Thoroughly:
This step is crucial. Use a final, clean, dry cloth to wipe away all moisture. This prevents water spots and protects the paint from any potential moisture damage.
For Tougher Grease and Grime
Sometimes, especially in the kitchen, you’ll encounter stubborn spots of grease or sticky residue that soapy water can’t quite handle. Before you reach for a harsh commercial cleaner, try one of these safe and effective alternatives.
•Vinegar and Water Solution:
A 50/50 mix of distilled white vinegar and warm water can work wonders on greasy buildup. Put the solution in a spray bottle, lightly mist the greasy area, let it sit for a minute or two, and then wipe it away with a soft, damp cloth. As with any method, be sure to rinse with a plain water cloth and dry the surface completely. Always test this in an inconspicuous spot first.
• Professional-Grade Degreaser:
Many professionals recommend a citrus-based, biodegradable cleaner like Krud Kutter for its powerful yet gentle action. It’s a favorite because it cuts through tough grease without damaging the paint finish. For general cleaning, you can dilute it significantly (as much as 10 parts water to 1 part cleaner). For tougher jobs, a 5:1 ratio is effective.
The “Oh No!” List: The Don’ts of Cabinet Care
Knowing what not to do is just as important as knowing what to do. Using the wrong products or techniques can quickly ruin your beautiful paint job, leading to scratches, discoloration, or a dull finish. Post this list on your fridge if you have to!
DON’T Use Harsh or Abrasive Cleaners
This is the number one mistake homeowners make. Avoid any cleaning products that contain bleach, ammonia, or other harsh chemicals. Also, stay away from powdered cleansers or any “soft scrub” type products. These chemicals and abrasives can break down the paint, causing it to fade, peel, or lose its sheen.
DON’T Use Abrasive Sponges or Pads
Never, ever use a magic eraser, scouring pad, steel wool, or any stiff-bristled brush on your painted cabinets. A magic eraser might seem soft, but it acts like extremely fine sandpaper and will rub the finish right off your cabinets. Always stick to soft cloths or sponges.
DON’T Use Wood Cleaners or Polishes
Products like Murphy’s Oil Soap or furniture polishes like Pledge are designed for stained wood, not painted surfaces. They often contain oils and waxes that do not get absorbed by the paint. Instead, they leave behind a sticky residue that attracts even more dust and grime, creating a dull, cloudy film that is difficult to remove.
DON’T Let Moisture Linger
Water is the enemy of any painted surface, especially around the seams and joints of cabinet doors. Always wipe up water spills, steam, and condensation immediately. This is why it’s so important to dry your cabinets thoroughly after cleaning. It’s also a great idea to run your kitchen or bathroom exhaust fan when cooking or showering to help control the humidity in the room.
Beyond Cleaning: Tips for Long-Term Longevity
With the right cleaning routine, your cabinets will stay looking great. But a few extra preventative measures can go a long way in protecting them from the physical wear and tear of daily life.
• Install Cabinet Door Bumpers:
These are small, inexpensive, self-adhesive dots made of rubber or silicone that you can place on the inside corners of your cabinet doors and drawers. They provide a soft cushion when the door closes, preventing the wood from banging against the frame. This simple addition dramatically reduces the chance of chipping the paint around the edges of your doors.
• Be Mindful of Your Habits:
Try to avoid slamming doors and drawers. If you have a silverware drawer, make sure no utensils are sticking up when you close it, as this is a common cause of nicks and chips. Similarly, be careful not to overstuff cabinets in a way that forces pots, pans, or boxes to press against the inside of the doors.
•Address Chips and Scratches Promptly:
Even with the best care, accidents can happen. If you get a small chip or scratch, it’s best to address it sooner rather than later. A small touch-up can prevent moisture from getting under the paint and causing a bigger problem.
Your best bet is to call the professionals who painted your cabinets. At JT Paint & Design, we keep detailed records of the exact products and colors used on your project, so we can provide a seamless, invisible repair.
Your beautifully painted cabinets are a centerpiece of your home. By following these simple guidelines—being patient during the curing period, adopting a gentle cleaning routine, and avoiding harsh products—you can easily maintain their stunning finish. A little care goes a long way in protecting your investment and ensuring you’ll love your cabinets for many years to come.
A Note on Exterior Paint: Applying the Same Principles
While this guide focuses on interior cabinets, many of the same principles apply to other professionally painted surfaces, including your home’s exterior. Just like with your cabinets, a professional exterior paint job from JT Paint & Design is a significant investment in your home’s curb appeal and protection. And just like with your cabinets, proper care and maintenance are key to maximizing that investment.
Your home’s exterior faces a much harsher environment than your kitchen cabinets. It’s exposed to direct sunlight, rain, wind, snow, and fluctuating temperatures. This constant barrage from the elements means that the paint is working hard every single day to protect your home. While exterior paints are formulated to be incredibly durable and weather-resistant, a little bit of regular attention from you can extend their life and keep your home looking its best.
The Importance of Regular Inspection
At least twice a year—once in the spring and once in the fall—take a walk around your home and inspect the painted surfaces. Look for:
• Cracking, Peeling, or Blistering:
These are signs that the paint’s seal has been broken. This can happen due to age, moisture getting behind the paint, or extreme temperature swings. Small areas can often be touched up, but larger areas may indicate a more significant issue that needs professional attention.
• Chalking:
This is a fine, powdery substance that can form on the surface of the paint over time as the paint film weathers and breaks down. A small amount of chalking is normal, but excessive chalking can mean the paint is nearing the end of its life.
• Fading:
Direct sunlight, especially on darker colors, will inevitably cause some fading over time. This is a cosmetic issue, but it’s good to be aware of.
• Mildew or Algae:
Look for green or black spots, especially in shaded, damp areas of your home’s exterior. These should be cleaned off promptly to prevent them from damaging the paint.
Cleaning Your Home’s Exterior
Just like your cabinets, your home’s exterior needs to be cleaned. An annual cleaning can wash away the dirt, grime, pollen, and pollutants that accumulate over the year. This not only makes your house look better but also removes substances that can break down the paint over time.
For most homes, a gentle wash is all that’s needed. You can often do this yourself with a garden hose, a soft-bristled brush on a long pole, and a bucket of the same mild, soapy water you use for your cabinets. Work in sections, from the top down, gently scrubbing the surface and then rinsing it thoroughly. Avoid using a high-pressure power washer.
While it might seem like a quick and easy solution, the intense pressure can easily damage the paint, chip wood, and force water up under the siding, leading to serious moisture problems. If you feel a power wash is necessary, it’s a job best left to professionals who have the right equipment and expertise to do it safely.
When cleaning, pay special attention to areas with mildew. You can treat these spots with a commercial mildew cleaner or a solution of one part bleach to three parts water. Be sure to protect your plants and landscaping before using any bleach solution, and rinse the area thoroughly when you’re done.
By applying the same principles of gentle, regular cleaning and prompt attention to any issues, you can protect all the painted surfaces of your home, inside and out. A little bit of maintenance goes a long way in preserving the beauty and integrity of a professional paint job, ensuring that your home continues to look its best for years to come.